Here's what you need:
2 - 8" x 4" pieces of fabric (aprox., you don't have to be exact)
2 - 1 1/2" x 2 1/2 " pieces of fabric
sewing machine/needles/thread - (duh!)
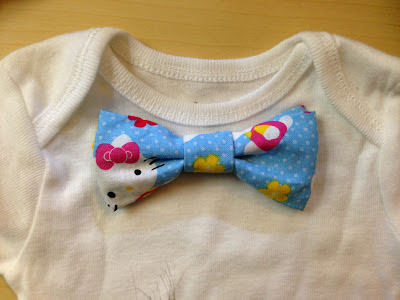
After finishing the first bow tie (that ended up being Jacob's) I realized I did not pay attention to print placement so you really couldn't see Hello Kitty in the bow tie at all. (Well that was stupid because he ended up wearing something less than his Hello Kitty BEST). So the photos in the tutorial are of Thomas' tie where I did pay attention to print placement. If your fabric requires special print placement treatment, you'll want the desired design to be just outside the middle and on the bottom half of the fabric. Looking at that top large piece of fabric in the photo, the Hello Kitty that is visible in the finished tie is the first whole cat on the bottom part of the tie.
With your larger pieces of fabric, fold in half lengthwise, right side in, and sew long edge.
Turn inside out. If you want to be really particular, you can iron flat. You'll see I was not that particular.
Sew one edge closed. You won't see this seam as it will be covered by the "knot" portion of the tie. I found sewing it right side out added less bulk to the bow then trying to sew all sides and then turning right side out. Alternatively, you could sew both edges - but like I said, I wasn't that particular. The raw edge will be underneath this finished edge...
Fold edges in to middle placing raw edge underneath sewn edge (see, what'd I tell you) and pin in place
Stitch two edges together being careful not to sew through the front piece of the bow tie. I found stitching by hand was much easier than trying to cram that itty bitty piece below my foot on my sewing machine. Do this for both pieces of fabric.
Stitch the bottom side together to hold in place.
Turn inside out and sew open edge closed.
TA-DA!
Sew bow tie onto onesie (or bib or shirt or whatever). I stitched the middle of the bow straight on to the onesie and then tacked the top of the tie to the onesie with a few stitches to keep it from flopping around. Alternatively, you could attach snaps to the tie and the shirt to make it removable/exchangeable.


No comments:
Post a Comment